Tutorials
Real-time chat
In this tutorial you will learn how websockets work, the specifics of socket.io and how to create a real-time chat with server.js.
Make sure to follow the getting started tutorial first. We won't use any database, so there is no chat history, just real time chat.
This tutorial is a beginner introduction. However, the socket.io plugin is experimental right now so please don't use this in production (or at least lock the version down). Also, there are absolutely no security measures now since this is a proof of concept.
User Interface
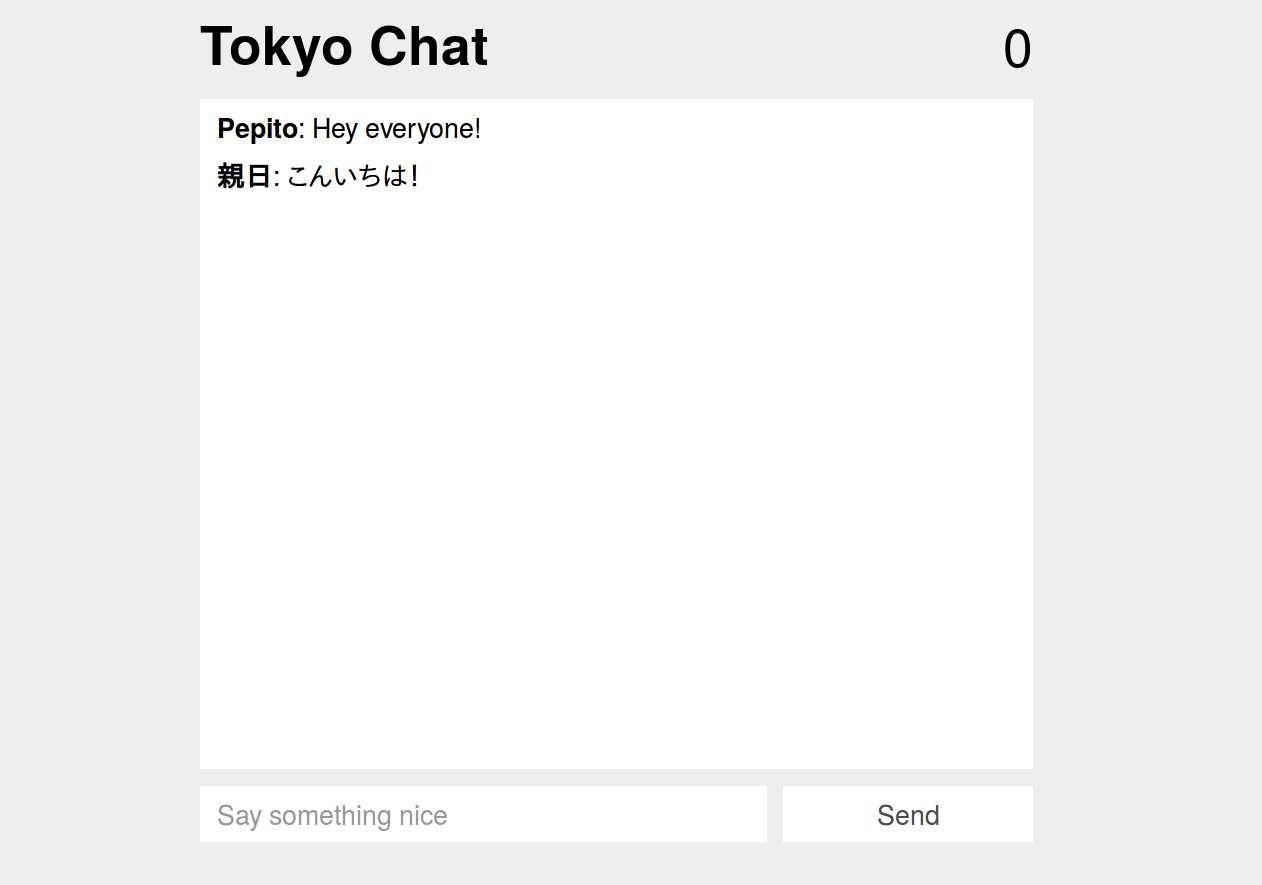
First we are going to create a user interface that looks something like this:

In your project folder create a folder public and put the file index.html inside:
<!-- ./public/index.html -->
<!DOCTYPE html>
<html>
  <head>
    <title>First website</title>
    <meta charset="utf-8">
    <meta name="viewport" content="width=device-width, initial-scale=1">
    <link rel="stylesheet" href="style.css">
  </head>
  <body>

    Hello world

    <!-- Include jquery, cookies, socket.io (client-side) and your own code -->
    <script src="https://code.jquery.com/jquery-3.2.1.slim.min.js"></script>
    <script src="https://unpkg.com/[email protected]/cookie.min.js"></script>
    <script src="https://unpkg.com/socket.io-client@2/dist/socket.io.slim.js"></script>
    <script src="javascript.js"></script>
  </body>
</html>
This is the basic, fairly standard HTML skeleton of your chat. We are including few libraries that we will be using later on. Save it, open the file in your browser and you should see "Hello World".
Now let's make the actual interface. We will wrap everything with a <main> tag for the general layout, then put the different elements inside. This code goes in the place of Hello world in the skeleton above:
<main>
  <header>
    <div class="user-count">0</div>
    <h1>Tokyo Chat</h1>
  </header>

  <section class="chat">
    <p><strong>Pepito</strong>: Hey everyone!</p>
    <p><strong>親日</strong>: こんいちは!</p>
  </section>

  <form>
    <input type="text" placeholder="Say something nice" />
    <button>Send</button>
  </form>
</main>
The focus of this tutorial is not to teach HTML+CSS, so for now let's copy/paste the CSS into ./public/style.css:
/* ./public/style.css */
* {
  box-sizing: border-box;
  transition: all .3s ease;
}

html, body {
  background: #eee;
  width: 100%;
  height: 100%;
  margin: 0;
  padding: 0;
}

main {
  width: calc(100% - 20px);
  max-width: 500px;
  margin: 0 auto;
  font-family: Helvetica, Arial, Sans, sans-serif;
}

h1, .user-count {
  margin: 0;
  padding: 10px 0;
  font-size: 32px;
}

.user-count {
  float: right;
}

.chat {
  content: '';
  width: 100%;
  height: calc(100vh - 165px);
  background: white;
  padding: 5px 10px;
}

.chat p {
  margin: 0 0 5px 0;
}

input, button {
  width: 100%;
  font: inherit;
  background: #fff;
  border: none;
  margin-top: 10px;
  padding: 5px 10px;
}

button:hover {
  cursor: pointer;
  background: #ddd;
}

@media all and (min-width: 500px) {
  .chat {
    height: calc(100vh - 140px);
  }
  input {
    width: calc(100% - 160px);
  }
  button {
    float: right;
    width: 150px;
  }
}
You can see an example of this interface in this JSFiddle. It is responsive and has many small details, so it should work smoothly on any (modern) device. It looks like this:
Choose a username
Before doing anything else let's get the visitor username. Create a file called javascript.js inside the folder public with this:
// /public/javascript.js

// Get the current username from the cookies
var user = cookie.get('user');
if (!user) {

  // Ask for the username if there is none set already
  user = prompt('Choose a username:');
  if (!user) {
    alert('We cannot work with you like that!');
  } else {
    // Store it in the cookies for future use
    cookie.set('user', user);
  }
}
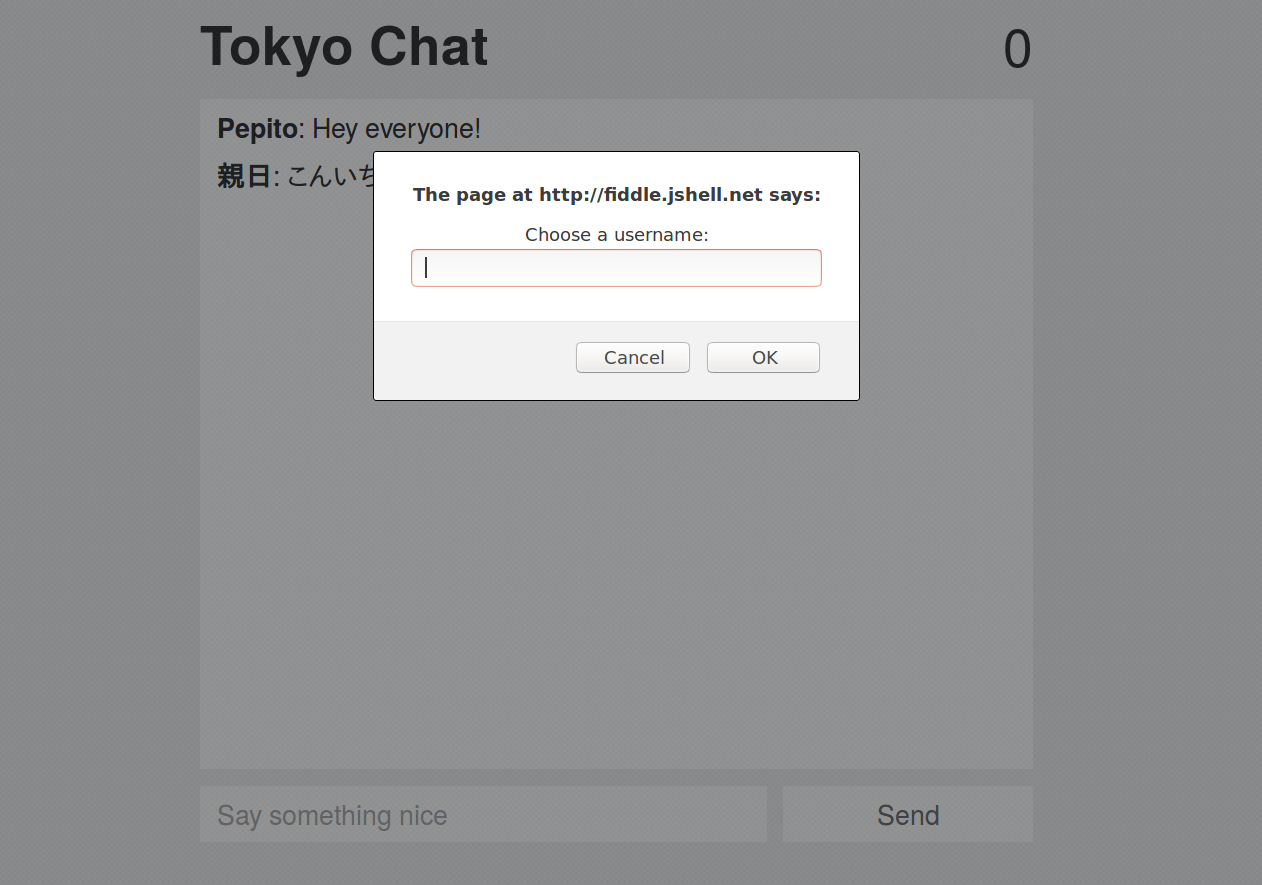
It will try to retrieve the username from the cookies. If there is none, it will ask for the username with a standard system prompt like this:
Now that we have the username stored in the cookies, let's see how to communicate with websockets.
Sending messages
Websockets is a web technology for real time, bidirectional communication from the browser to the server and back. This has traditionally been a hard problem, with the browser having to poke every X seconds to the server to ask for new data.
The most commonly used library is socket.io since it makes it a lot easier to use the underlying technology. We will use the client library (already included in our skeleton HTML code) for the browser. First, let's connect to the server:
// Connect to the server-side websockets. But there's no server yet!
var socket = io();
Then we will be sending and receiving messages. Let's handle the receiving messages first with socket.on(TYPE, callback):
// The user count. Can change when someone joins/leaves
socket.on('count', function (data) {
  $('.user-count').html(data);
});

// When we receive a message
// it will be like { user: 'username', message: 'text' }
socket.on('message', function (data) {
  $('.chat').append('<p><strong>' + data.user + '</strong>: ' + data.message + '</p>');
});
Finally, let's send some data when our form is submitted with socket.emit():
// When the form is submitted
$('form').submit(function (e) {
  // Avoid submitting it through HTTP
  e.preventDefault();

  // Retrieve the message from the user
  var message = $(e.target).find('input').val();

  // Send the message to the server
  socket.emit('message', {
    user: cookie.get('user') || 'Anonymous',
    message: message
  });

  // Clear the input and focus it for a new message
  e.target.reset();
  $(e.target).find('input').focus();
});
Awesome, if you have followed all along this is the final code for javascript.js:
// ./public/javascript.js

// Get the current username from the cookies
var user = cookie.get('user');
if (!user) {

  // Ask for the username if there is none set already
  user = prompt('Choose a username:');
  if (!user) {
    alert('We cannot work with you like that!');
  } else {
    // Store it in the cookies for future use
    cookie.set('user', user);
  }
}

var socket = io();

// The user count. Can change when someone joins/leaves
socket.on('count', function (data) {
  $('.user-count').html(data);
});

// When we receive a message
// it will be like { user: 'username', message: 'text' }
socket.on('message', function (data) {
  $('.chat').append('<p><strong>' + data.user + '</strong>: ' + data.message + '</p>');
});

// When the form is submitted
$('form').submit(function (e) {
  // Avoid submitting it through HTTP
  e.preventDefault();

  // Retrieve the message from the user
  var message = $(e.target).find('input').val();

  // Send the message to the server
  socket.emit('message', {
    user: cookie.get('user') || 'Anonymous',
    message: message
  });

  // Clear the input and focus it for a new message
  e.target.reset();
  $(e.target).find('input').focus();
});
Server handling
This library is included by default from server, so let's take advantage of it! First we create a simple server that will render our HTML page. Create a file in the root of your project called index.js:
// /index.js

const server = require('server');
const { get, socket } = server.router;
const { render } = server.reply;

server([
  get('/', ctx => render('index.html'))
]);
We can run in the terminal node . and access to localhost:3000 to see our chat interface.
Then we will add connect and disconnect routes. We want to update everyone with the current amount of users when someone joins or leaves. We can use the same function for both of them that will send a message to everyone with socket.io's io.emit():
// /index.js

const server = require('server');
const { get, socket } = server.router;
const { render } = server.reply;

const updateCounter = ctx => {
  ctx.io.emit('count', ctx.io.sockets.sockets.length);
};

server([
  // For the initial load render the index.html
  get('/', ctx => render('index.html')),

  // Join/leave the room
  socket('connect', updateCounter),
  socket('disconnect', updateCounter)
]);
Finally let's create a new socket router that, when it receives a message, it will push the same message to everyone in a similar way as before:
// /index.js

const server = require('server');
const { get, socket } = server.router;
const { render } = server.reply;

// Update everyone with the current user count
const updateCounter = ctx => {
  ctx.io.emit('count', Object.keys(ctx.io.sockets.sockets).length);
};

// Send the new message to everyone
const sendMessage = ctx => {
  ctx.io.emit('message', ctx.data);
};

server([
  get('/', ctx => render('index.html')),
  socket('connect', updateCounter),
  socket('disconnect', updateCounter),
  socket('message', sendMessage)
]);
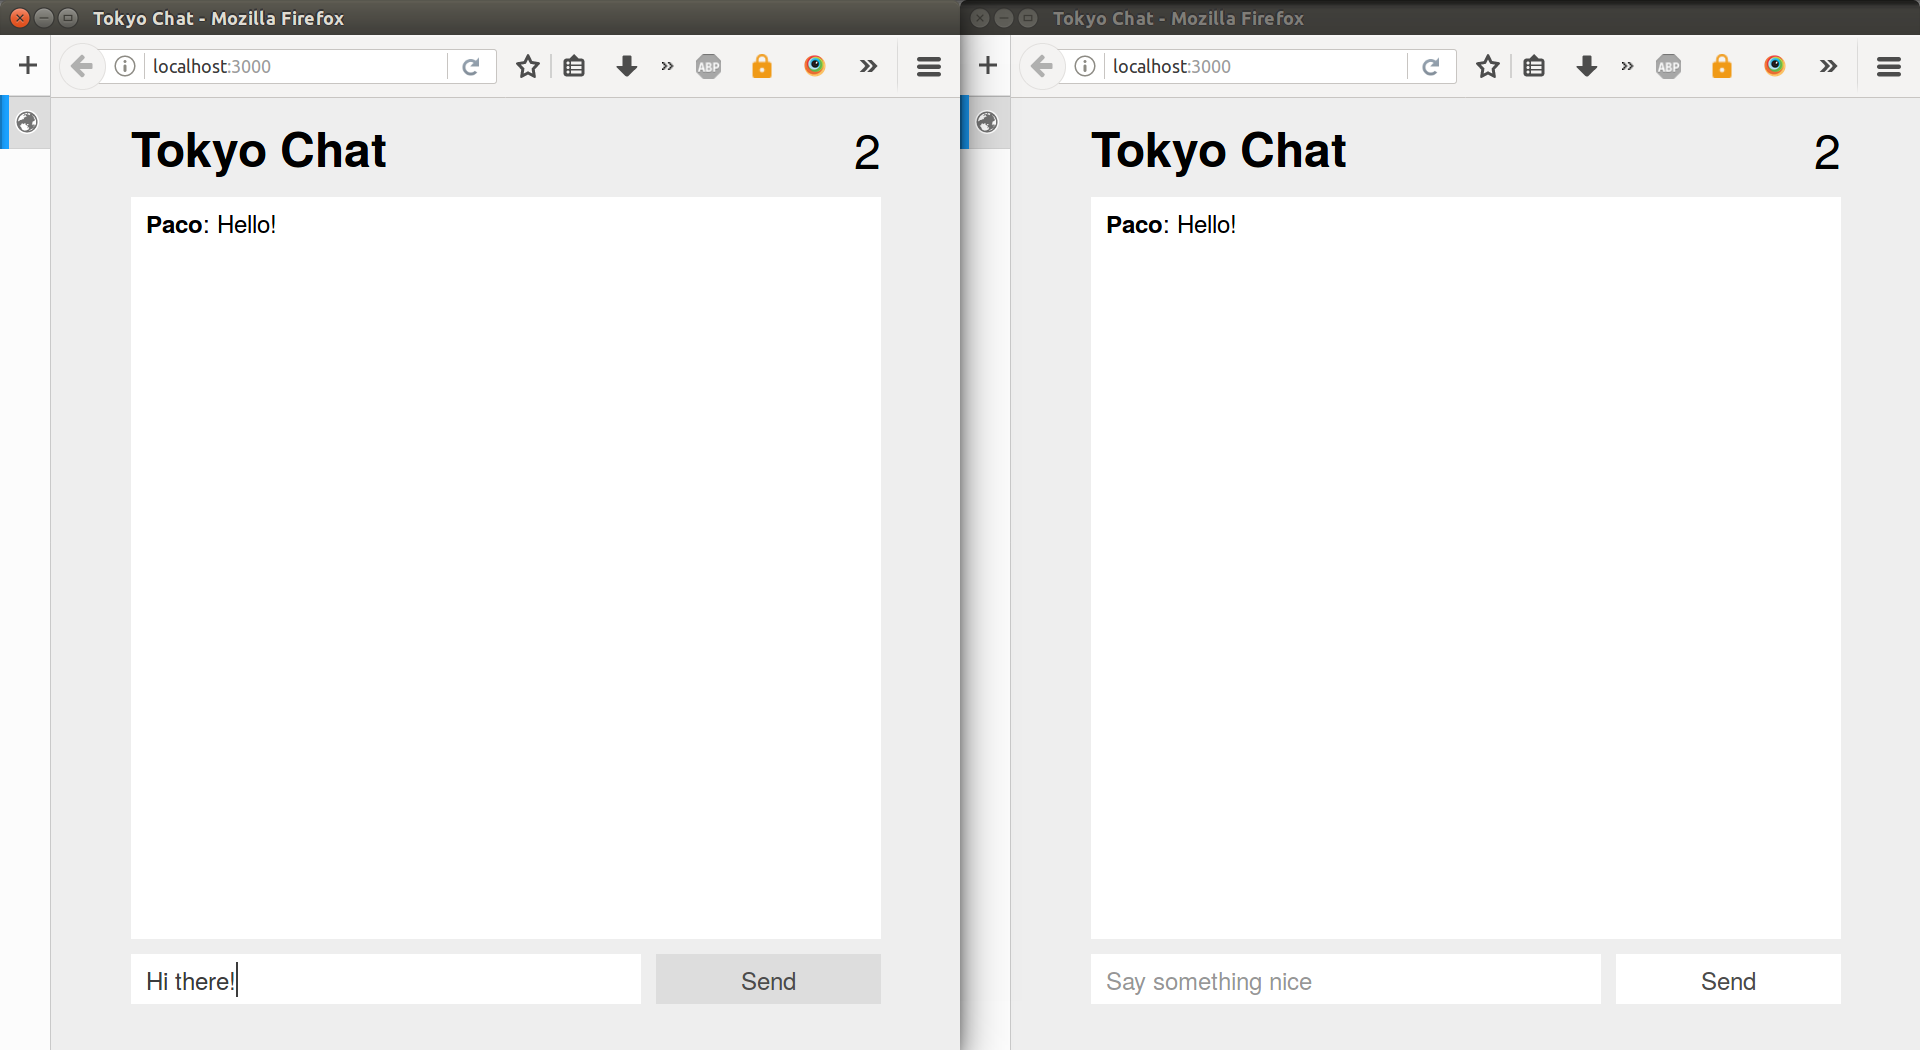
Great, now we have our back-end. Launch it by running this in your terminal:
node .
Access localhost:3000 in two different tabs. You can now talk with yourself in realtime!
User X joined
Exercise: add a new socket route and the corresponding back-end and front-end code to display a new message when a user writes their username.
Tip: send an event called join from the front-end when a user writes their username with socket.emit('join', ...).
Tip 2: add a route in the back-end for this event that will emit the same to everyone.
Tip 3: add a handler socket.on('join', ...) for this event in the front-end in a similar fashion to the socket.on('message', ...).
Upload to Heroku
Exercise: upload our chat to Heroku so several people can use it.
Tip: make sure to specify the engine in package.json, since we want for heroku to use Node.js 7.6.0 or newer.
XSS Protection
Exercise: what happens when we write <script>;alert('Hello world!');</script> as a message? Why is this dangerous? Please fix this issue.
Extra: did you fix the visitor writing the same code in their username? Make sure this is also sanitized.
Keep reading
Subscribe to our Mailchimp list to receive more tutorials when released:
Get Great Tutorials